
Hey folks! This article is going to explain how to use the Arkenforge Touch Client to get touch screen integration for your Arkenforge Toolkit games. If you don’t have a touch screen setup just yet, check out our sister article that explains how to build your touch-capable digital tabletop: https://arkenforge.com/using-a-touch-screen-with-your-digital-table
It is important to note that the Arkenforge Touch Client is only available for installation on Windows and Android devices.
Installing the Arkenforge Touch Client
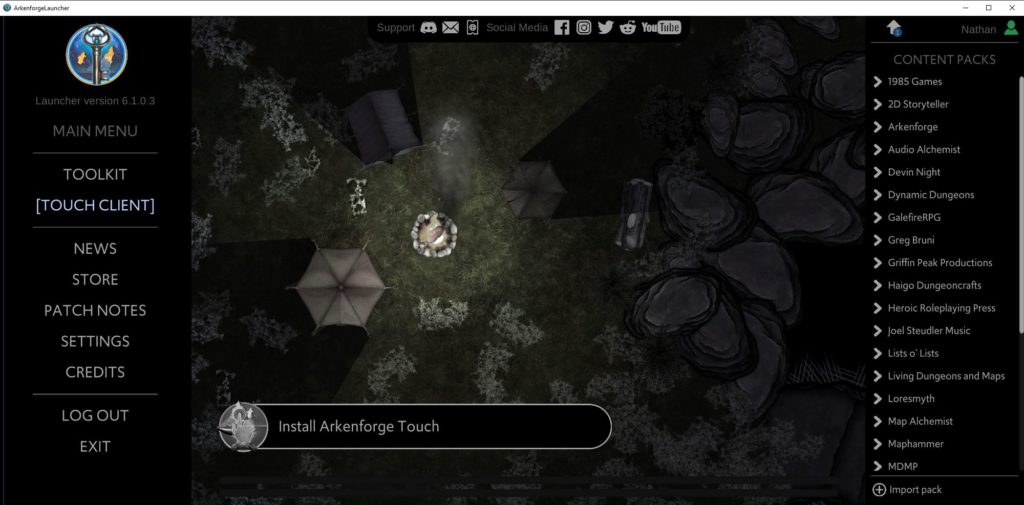
You can now find the Arkenforge Touch Client in its own section of the Arkenforge Launcher. Simply navigate to its section on the left-side menu, then click on the ‘Install Arkenforge Touch’ button. Once the installation has completed, the button text will change from ‘Install’ to ‘Launch’. Click Launch to open the client.
You can also find the Touch Client on the Google Play store. Just search Arkenforge Touch Client.
If you have an older Android device, the following link will give you an APK file that will install the Touch Client onto your device: https://www.dropbox.com/scl/fi/svniz9lpq6tqq47xfkq8x/ArkenforgeTouchClient.apk?rlkey=1ssf1q7da0bpmpui4buodi1q6&dl=1
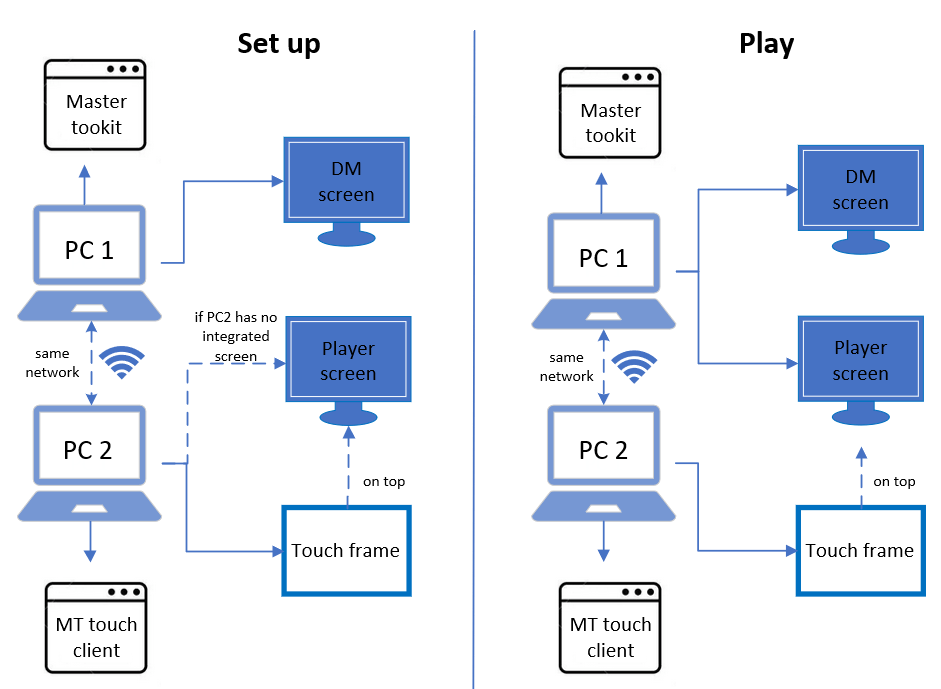
Hardware setup
The Touch Client requires two devices to operate. One to drive the Toolkit and display the player screen, and one to drive the Touch Client and register the touch input.
Both devices must be connected to the same local network, as the Touch Client sends touch data to the Toolkit via the network.
One of our users, Shiru, created this helpful graphic to help you get set up:
The Arkenforge Touch Client in action
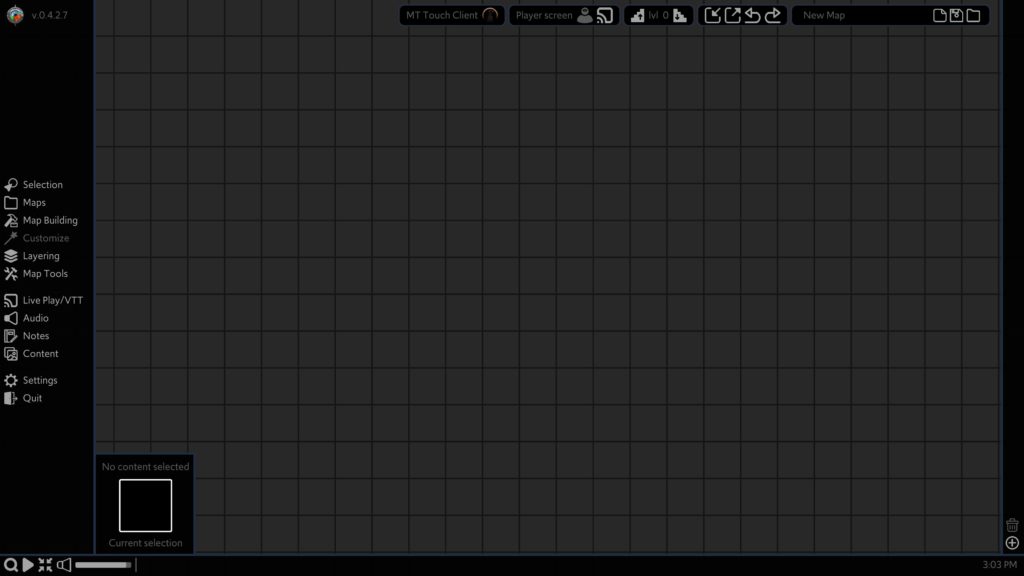
After the Splash screen, you will be greeted with the following image:

The bottom row shows the current Touch and Toolkit connection status. Touch will switch to ‘connected’ if it detects a useable touch device. This change does not happen live, so if your touch screen isn’t connected when you start the app, you may need to restart for it to be detected. The touch device may still work. It’ll just be the text that doesn’t update.
If the device running the Touch Client is on the same local network as the Arkenforge Toolkit, it will detect it and connect automatically. No need for port forwarding or manually entering IP addresses. If the touch client fails to connect automatically, make sure that the client and the Toolkit are on the same network. You may need to allow both programs through the firewall as well.
Touch points will appear in the app with a coloured circle and a number. These represent the points that are sent to the Arkenforge Toolkit. If no points appear, your touch device may not be working correctly.
You can quit the touch client by using the ‘Escape’ key on your keyboard, or by using the ‘Close Arkenforge Touch Client’ button in the Arkenforge Toolkit.
Arkenforge Toolkit Configuration Settings
Once you’re all connected up, you’ll notice the MT Touch Client widget at the top of your Toolkit screen. If this bar doesn’t appear, it means that your touch client is failing to connect to the Toolkit.
Clicking on the Settings button will provide the following options, which we will explain below:
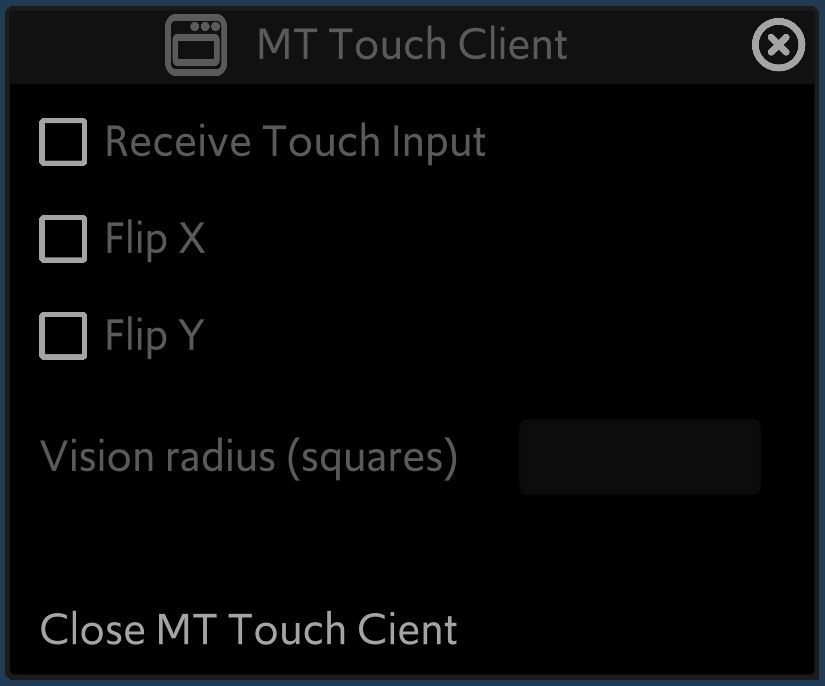
Receive Touch Input: Toggle whether input from the touch client is processed.
Flip X: Flip the Touch input coordinates on the X axis. Used to ensure that the touch screen points line up with your display.
Flip Y: Flip the Touch input coordinates on the Y axis. Used to ensure that the touch screen points line up with your display.
Vision radius (squares): Enter how many squares a touch point will reveal
Close Arkenforge Touch Client: Closes the touch client remotely.
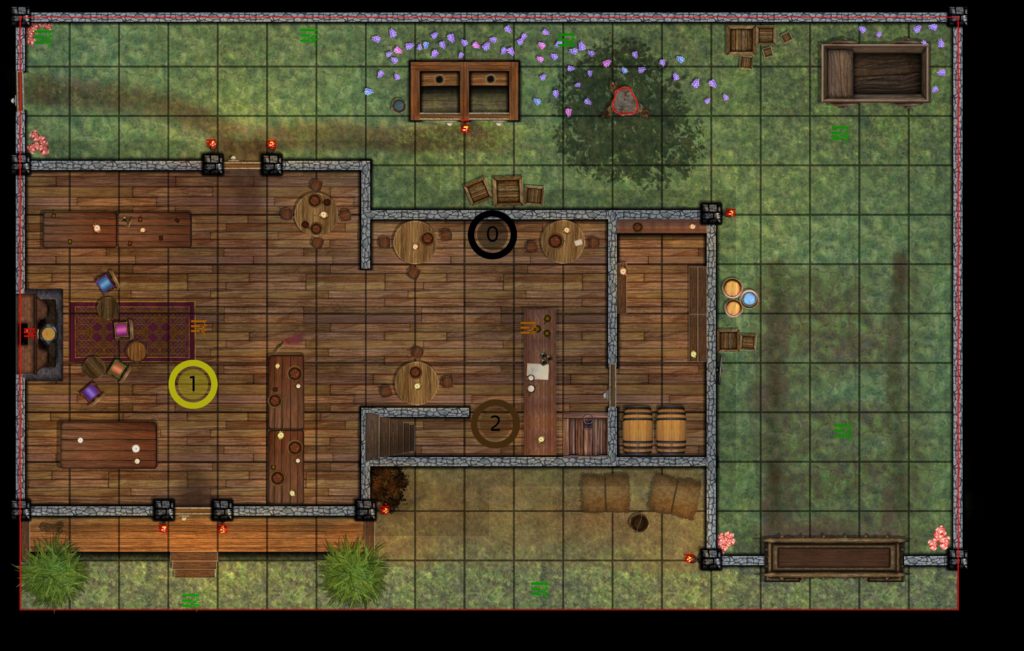
Touch points will appear in the Toolkit as coloured circles with a number that represents the given touch point. These colours are selected randomly upon loading the Toolkit, and are currently not changeable. In future you will be able to link these points to characters.
This should cover everything you need to get your Arkenforge Touch Client up and running! If you have any issues at all, hit us up on our Discord at https://discord.gg/Arkenforge, or email nathan@arkenforge.com

Comments are closed.